Step 1: The first step to assigning a cost centre to an employee is to make a note of 3 ledger codes: Gross, NI and superannuation ledger codes- these can be found in the employees job role.
On the central side of BPS navigate to the dashboard, then you should see a job role tab.
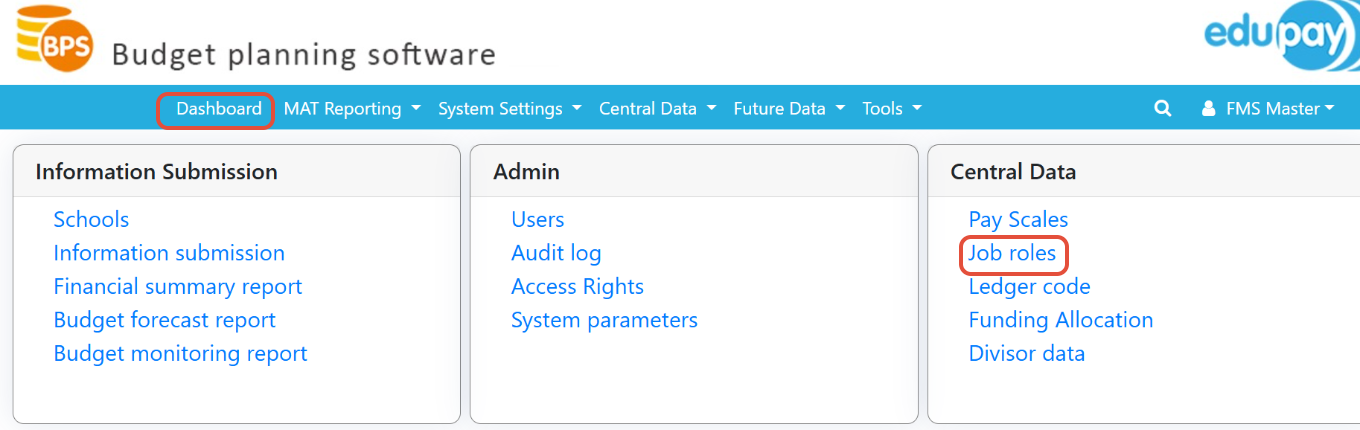
In the job role tab search the relevant job role and click edit--> you will then see the 3 codes.
The relevant Ledger codes to note are:
Example
Gross: 612100
NI: 612300
Pension: 612200

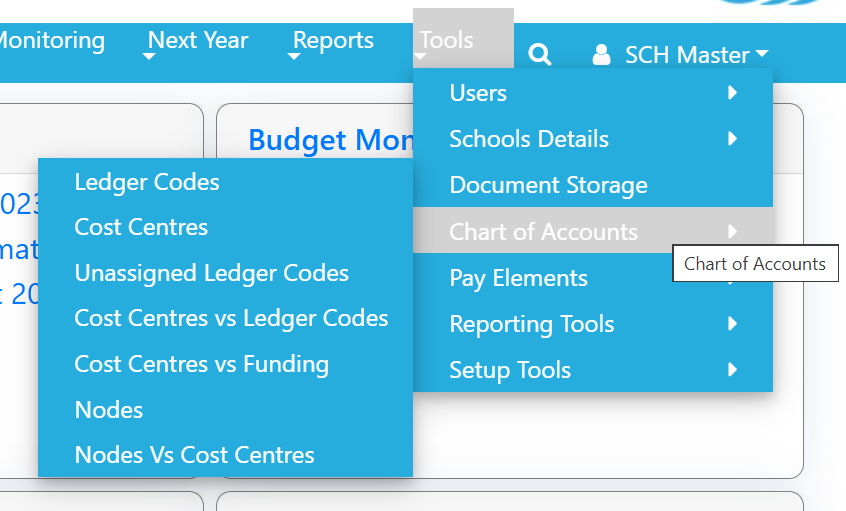
Step 2: Now we have the ledger codes noted down it is time to map them to a cost centre.
Mapping to a cost centre needs to be done in the school that the employee is employed in via tools (top right) --> chart of accounts --> Ledger codes.
Once in the ledger code screen you will need to search for 1 of the 3 ledger codes noted down earlier, then click edit.
After clicking edit you should be greeted by two tabs, ledger code details and cost centres (select cost centres)
Then search the relevant cost centre and tick it on the left hand side (don't forget to save at the bottom of the page)
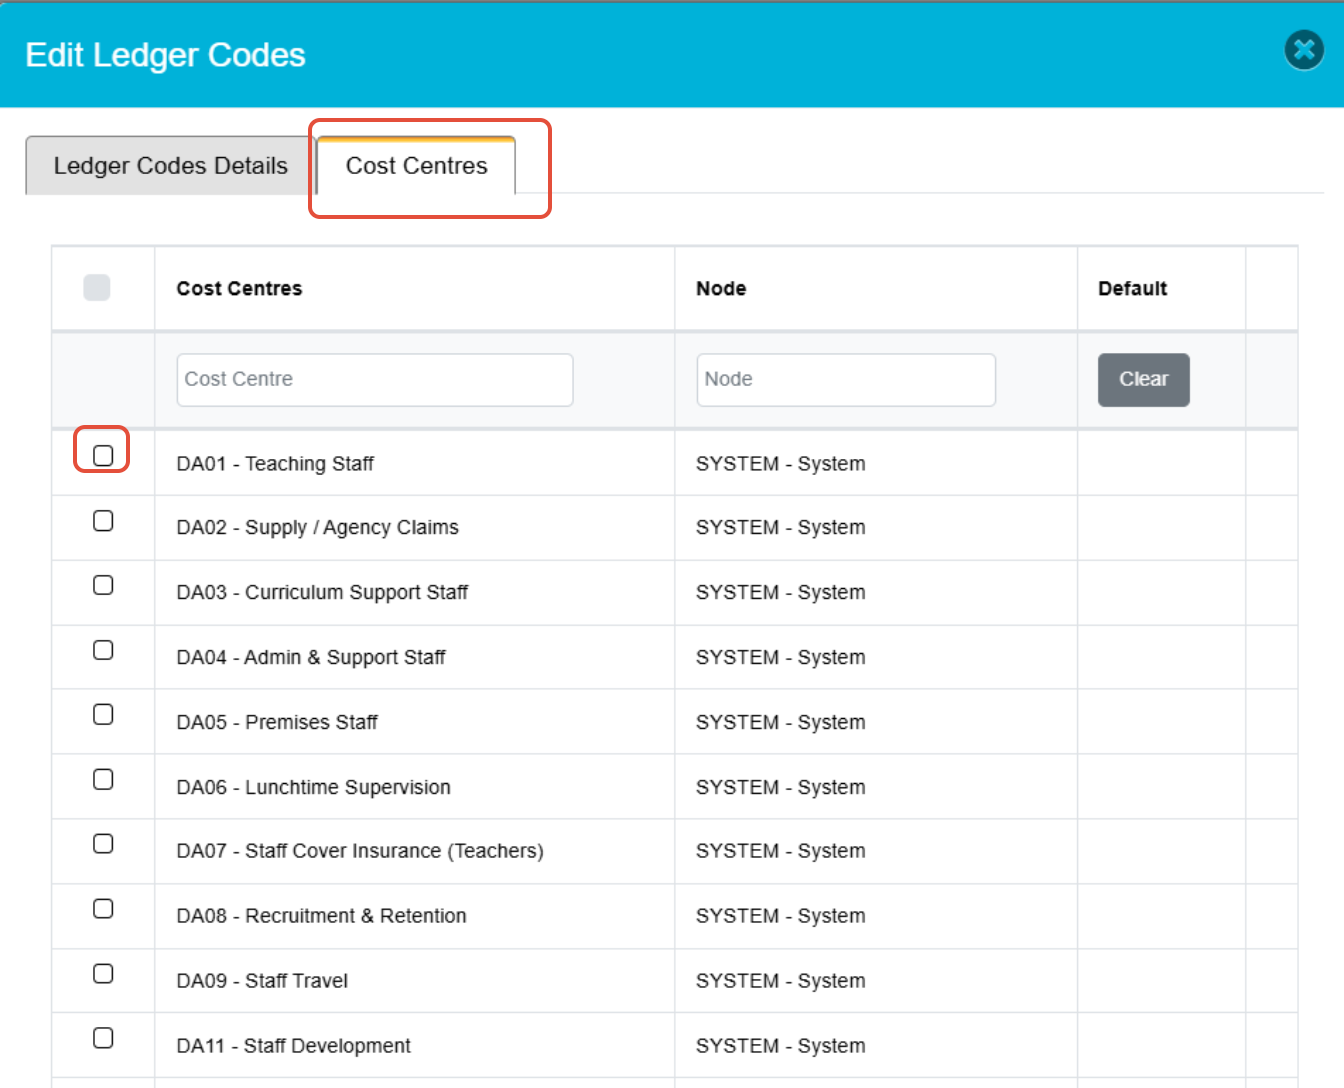
After you save you will just need to repeat this step for the other two ledger codes so all three are assigned to the same cost centre.
Step 3: Now all the ledgers have a cost centre assigned you will need to go to your employee scenario --> search employee --> assign cost centre on the personal tab.
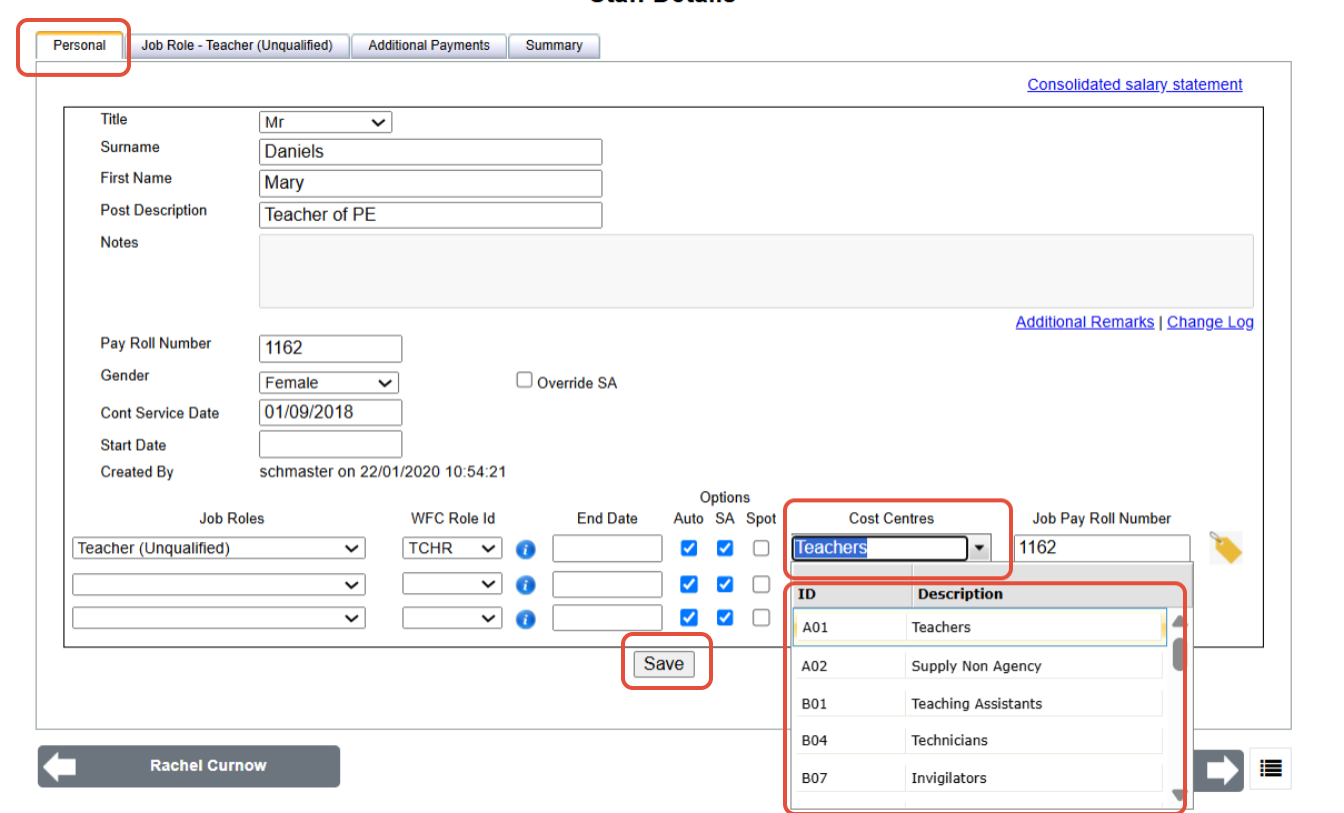
All of the cost centres you have assigned will show in a drop down list like above.
Was this article helpful?
That’s Great!
Thank you for your feedback
Sorry! We couldn't be helpful
Thank you for your feedback
Feedback sent
We appreciate your effort and will try to fix the article